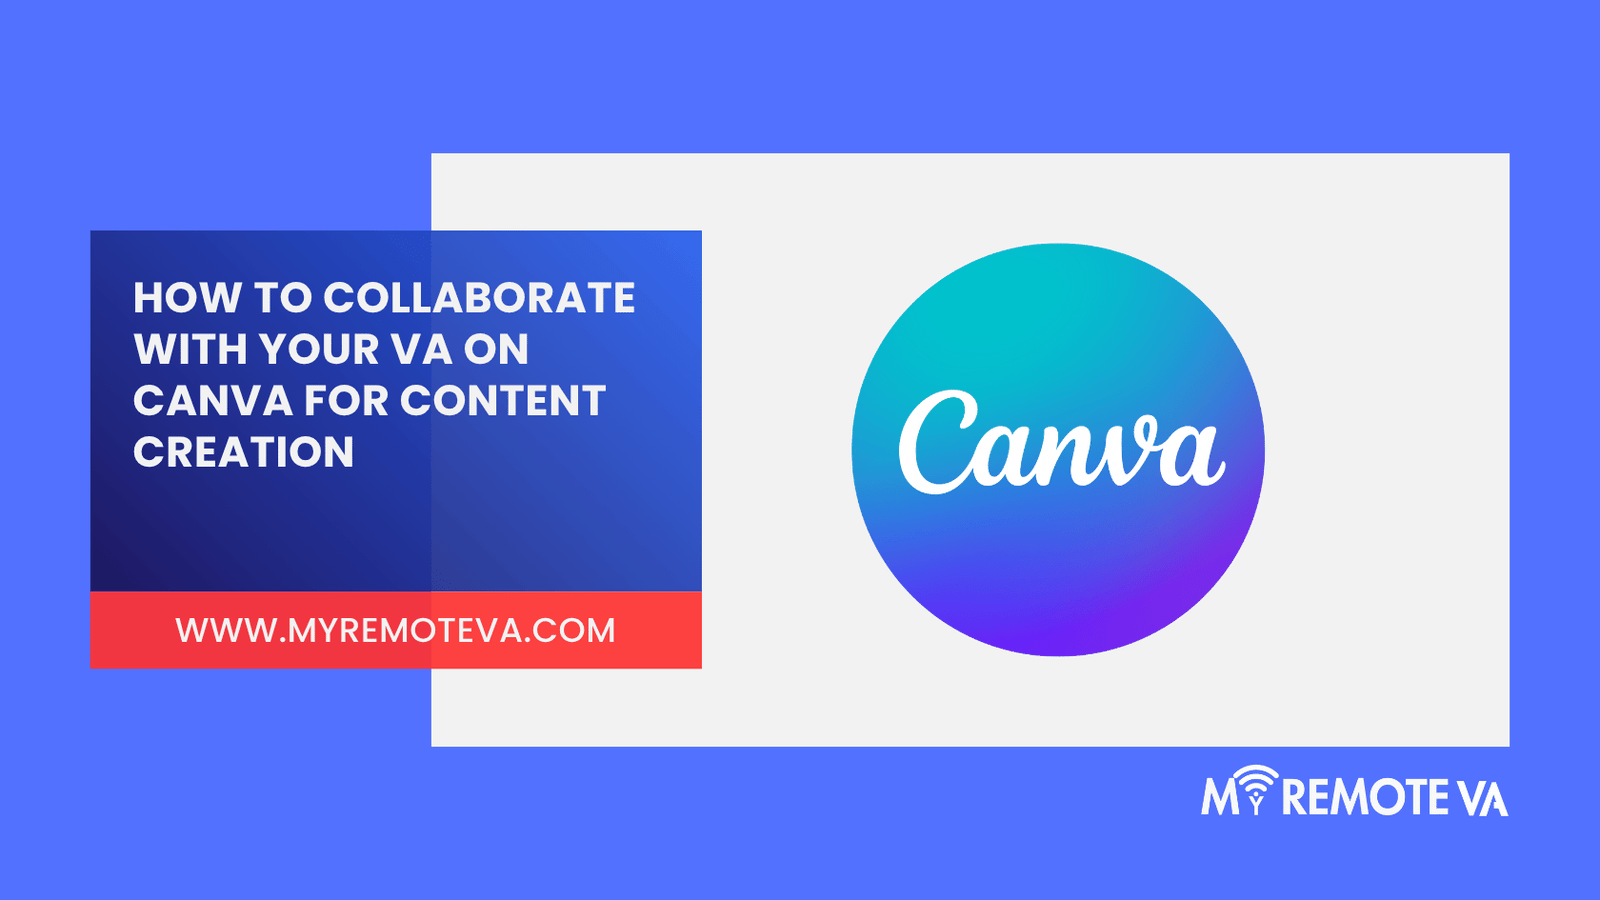
How to Collaborate with Your VA on Canva for Content Creation
Canva offers excellent collaborative features, making it a powerful tool when working with a virtual assistant (VA) on content creation. Effective collaboration streamlines the content creation process and ensures consistent brand messaging.
- How to Collaborate with Your VA on Canva for Content Creation
- 1. Setting Up Your Canva Team
- 2. Sharing Designs and Templates with Your VA
- 3. Real-Time Collaboration Features in Canva
- 4. Canva Pro Features for Enhanced Collaboration
- 5. Workflow Best Practices for Canva and Your VA
- 6. Common Canva Collaboration Challenges and Solutions
- 7. Canva Integrations for Seamless Workflow
- 8. Case Studies and Examples (illustrating successful Canva VA collaboration)
- 9. Advanced Canva Tips for VA Collaboration (based on Singaporean/Australian trends)
- 10. Ensuring Security and Data Privacy
- FAQ: Collaborating with Your VA on Canva
- Q: What's the best way to invite my VA to my Canva account?
- Q: Should I give my VA admin access to my Canva account?
- Q: How do I prevent my VA from accidentally changing my brand colors?
- Q: How can I ensure design consistency across all my content?
- Q: What happens if my VA makes a mistake in a design?
- Q: How can I provide feedback effectively to my VA on Canva designs?
- Q: Is Canva Pro necessary for effective VA collaboration?
- Q: How do I handle licensing for stock photos used in Canva designs?
- Q: What's the best way to organize designs when working with a VA?
- Q: Can I track the changes my VA makes in Canva?
Utilizing Canva’s Team Features
One of the most straightforward ways to collaborate is by using Canva’s team features. By inviting your VA to your team, you grant them access to your brand assets, templates, and designs. This ensures everyone is working from the same foundation and adhering to brand guidelines. You can control their access levels, allowing them to edit, comment, or simply view designs based on their role. This is especially useful to ensure that the VA does not mistakenly alter brand elements.
Sharing Designs for Feedback and Edits
Canva’s sharing options simplify the feedback process. You can share a design with your VA, granting them specific permissions, such as “can edit” or “can comment.” This allows your VA to make direct changes or provide feedback within the design itself, eliminating the need for back-and-forth emails and screenshots. Real-time collaboration is also possible, allowing you and your VA to work on the same design simultaneously and see each other’s changes instantly.
Using Canva Templates for Consistent Branding
Leverage Canva’s template feature to maintain consistent branding across all your content. Create templates for social media posts, presentations, and other marketing materials, and then share them with your VA. This way, your VA can easily create new content while staying within your established brand guidelines. Update the master templates as needed, and those changes will propagate to all designs created from those templates, saving you time and ensuring consistency. You can set your Virtual Assistant with a task and tell them to create 5 posts weekly based on a design template, the VA can do that within the allocated time from a hourly plan.
Leveraging Comments for Clear Communication
Canva’s comment feature is essential for providing clear instructions and feedback. Use comments to highlight specific areas of a design that need attention or to provide context for changes. This ensures that your VA understands your expectations and can effectively implement your feedback. Clear communication within the design itself minimizes misunderstandings and accelerates the revision process.
By effectively utilizing these Canva collaboration features, you can empower your VA to create high-quality content that aligns with your brand and objectives. Remember to establish clear communication protocols and guidelines to ensure a seamless and productive collaborative workflow.
1. Setting Up Your Canva Team
One of the most effective ways to collaborate on content with your virtual assistant (VA) in Canva is by creating a Canva team. This allows you to share designs, templates, and brand assets seamlessly, ensuring consistency and efficiency in your workflow. It’s particularly crucial when delegating creative tasks and marketing material creation.
Creating Your Team
Here’s how to create a Canva team:
- Log into your Canva account. Make sure you’re using the account where you want to store your brand assets and collaborate.
- Click on “Teams” in the sidebar. You might need to click on “Menu” first to reveal the sidebar.
- Click “Create a team”. Follow the prompts to name your team. A descriptive name helps you easily identify it later.
Inviting Your VA
Once your team is created, you can invite your VA. Here’s how:
- Navigate to your team’s page.
- Click on “Invite members”.
- Enter your VA’s email address. Ensure you have the correct email address to avoid accidental invitations.
- Choose their role. You can assign them as an “Admin” (full control) or a “Member” (more restricted access). For most collaborative purposes, a “Member” role is sufficient.
- Click “Send invitation”. Your VA will receive an email with a link to join the team.
Benefits of Using a Canva Team
Setting up a Canva team offers several key benefits:
- Centralized Access: All your brand assets (logos, colors, fonts) and templates are accessible in one place. This ensures brand consistency, especially important when delegating creative tasks.
- Real-time Collaboration: You and your VA can work on the same design simultaneously. This streamlines the feedback and revision process.
- Simplified Sharing: Sharing designs with your VA becomes incredibly easy. No more emailing files back and forth!
- Organized Workflow: Teams help you organize your designs and templates into folders, making it easier for your VA to find what they need.
Consider your VA’s role and level of experience when assigning permissions. Providing clear instructions and guidelines will further enhance collaboration and ensure your VA can effectively support your content creation efforts. For example, if you have a startup and you want to create marketing material, you could ask your VA to create the initial draft and collaborate with them, providing edits and suggestions.
2. Sharing Designs and Templates with Your VA
Canva makes collaboration simple, and sharing designs and templates with your Virtual Assistant (VA) is a core component of that. Effectively delegating design tasks to your VA within Canva allows you to focus on other critical aspects of your business. There are a few ways to share access and ensure smooth workflow.
Sharing Access Options
Canva offers several methods for sharing your designs:
- Sharing with specific people: You can invite your VA to specific designs or templates by entering their email address directly into Canva. You can then specify the level of access: Can view or Can edit. Granting edit access allows your VA to make changes, while view access allows them to only see the design.
- Team Functionality: Creating a team in Canva allows you to share designs and templates with all team members. This is especially useful if you plan to work with multiple VAs or team members on various projects. Setting up a team centralizes resources and provides a shared workspace.
- Template Links: You can generate a template link for a design. When someone clicks the link, they’ll be able to create a copy of the design in their own Canva account, preserving your original template. This is ideal for sharing reusable assets without granting direct access to your original.
Choosing the Right Sharing Method
The best method depends on your specific needs and the nature of the design task.
- Collaborative Design Projects: For projects requiring back-and-forth revisions, direct sharing with Can edit access is ideal. This allows your VA to actively work on the design and incorporate your feedback in real-time.
- Brand Templates: If you have established brand templates that need to be used consistently, sharing a template link is a good option. This allows your VA to create new designs based on the template without altering the master copy.
- Admin and Creative Tasks: A virtual assistant can take care of admin, creative and marketing tasks to ensure your designs and templates are on point. With flexible hourly and team-based plans, you can delegate effectively.
3. Real-Time Collaboration Features in Canva
Canva offers powerful real-time collaboration features that make working with your Virtual Assistant (VA) on content creation a seamless experience. This eliminates the need for endless email chains and version control headaches.
Real-Time Editing and Commenting
Canva allows you and your VA to work on the same design simultaneously. Changes are reflected instantly, ensuring everyone is on the same page. This feature significantly speeds up the design process. Beyond simple editing, Canva provides a commenting feature. You or your VA can leave specific feedback directly on the design, highlighting areas for improvement or requesting revisions. This contextual feedback streamlines communication and ensures clarity.
Sharing and Permissions
Controlling access to your designs is crucial. Canva allows you to easily share your designs with your VA and set appropriate permissions. You can grant them editing access, allowing them to make changes, or view-only access, letting them provide feedback without directly altering the design. These granular permission settings maintain control over your brand assets and ensure only authorized individuals can modify them. This is especially helpful if your VA is handling sensitive marketing materials or confidential presentations.
Team Functionality
For larger projects or when working with multiple VAs, Canva’s team functionality is invaluable. You can create a team within Canva and easily share designs and templates with all team members. This centralizes your design assets and ensures consistency across all projects. This functionality is particularly useful if you’ve chosen to delegate creative tasks like marketing design to your VA team through a dedicated plan.
By leveraging Canva’s real-time collaboration features, you can effectively work with your VA to create professional and engaging content, regardless of their location. This collaborative environment not only improves efficiency but also fosters a more creative and productive working relationship.
4. Canva Pro Features for Enhanced Collaboration
While the free version of Canva offers basic collaboration features, upgrading to Canva Pro unlocks powerful tools that significantly streamline teamwork and content creation with your Virtual Assistant (VA).
Improved Team Management
Canva Pro provides enhanced team management capabilities, allowing you to easily add, remove, and manage team members. You can assign specific roles and permissions to your VA, ensuring they have the appropriate access levels to work on designs without compromising your overall account security.
Real-time Collaboration
Canva Pro enables real-time collaboration, meaning you and your VA can work on the same design simultaneously. This eliminates the need for constant back-and-forth communication and version control issues. You can see each other’s edits live, providing immediate feedback and ensuring a cohesive design process.
Shared Brand Kit
Maintaining brand consistency is crucial. Canva Pro allows you to create and share a brand kit with your VA. This kit includes your brand logos, color palettes, fonts, and other essential visual elements. By centralizing these assets, you ensure that all designs created by your VA align with your brand identity.
Unlimited Storage
The free version of Canva has storage limitations. Canva Pro provides unlimited storage, allowing you and your VA to store all your designs, images, and other assets in one place without worrying about running out of space. This simplifies file management and ensures that all necessary resources are readily available.
Content Planner
For VAs assisting with social media management, Canva Pro’s content planner is a valuable asset. It allows you to schedule your Canva designs directly to social media platforms, streamlining your content marketing workflow. Your VA can create and schedule posts in advance, ensuring a consistent online presence.
By leveraging Canva Pro’s collaboration features, you can empower your VA to create high-quality content efficiently and effectively, freeing up your time to focus on other critical aspects of your business.Delegate your creative tasks to a skilled VA allows founders to concentrate on their core business functions, driving growth and success. You can delegate admin, tech, customer support, marketing, creative tasks, or executive work — and a Dedicated Supervisor manages your VA, shift, processes, and reporting so you don’t have to. Choose from curated Hourly Monthly Plans of (5, 10, 20, 30 hours) or build a team with Dedicated Plans, for 80 hours, or for 160 hours, or multi-VA setups.
5. Workflow Best Practices for Canva and Your VA
Collaborating effectively on Canva with your Virtual Assistant requires a structured workflow. These best practices can help ensure efficiency and consistency:
Clear Communication is Key
Before your VA starts working on a design, provide a detailed brief. This should include:
- Specific Objectives: What is the purpose of the design? (e.g., social media ad, blog header, presentation slide)
- Target Audience: Who are you trying to reach?
- Brand Guidelines: Include your brand colors, fonts, logo usage, and overall style guide. Consistency is crucial for brand recognition.
- Content Outline: Provide the text, images, and any other elements that need to be included in the design.
- Desired Outcome: What action do you want viewers to take?
Organize Your Canva Account
A well-organized Canva account is essential for seamless collaboration.
- Folders: Create folders for different projects, clients, or design types.
- Team Folders: Utilize team folders to share assets and designs with your VA, ensuring everyone has access to the correct files.
- Templates: Develop and save templates for frequently used designs. This saves time and ensures brand consistency.
Leverage Canva’s Collaboration Features
Canva offers several features specifically designed for teamwork:
- Sharing Options: Share designs with your VA with editing access. This allows them to make changes directly within the design.
- Comments: Use the commenting feature to provide feedback and suggestions directly on the design. This eliminates confusion and keeps communication centralized.
- Version History: Canva automatically saves versions of your designs, allowing you to easily revert to previous iterations if needed.
Establish a Review Process
Implement a clear review process to ensure quality control:
- Initial Review: After your VA completes the initial design, review it thoroughly and provide detailed feedback.
- Revisions: Your VA can then make the necessary revisions based on your feedback.
- Final Approval: Once you are satisfied with the design, give it final approval.
Consistent Feedback and Training
Regular feedback is crucial for your VA’s growth. Be specific and constructive in your feedback. Consider providing ongoing training on Canva best practices and any new design trends.
By implementing these workflow best practices, you can ensure a productive and efficient collaboration with your VA on Canva, allowing you to focus on other critical aspects of your business. A well-managed virtual assistant relationship, with clear communication and defined processes, often yields designs aligned with your brand and business goals. If you’re looking to offload more than just design tasks, services exist that offer virtual assistants managed by dedicated supervisors, handling various tasks from admin to marketing, potentially freeing up more of your time.
6. Common Canva Collaboration Challenges and Solutions
While Canva simplifies design collaboration, some challenges can arise when working with a Virtual Assistant (VA). Understanding these hurdles and implementing effective solutions ensures a smooth and productive partnership.
Overlapping Edits and Version Control
One common issue is multiple users editing the same design simultaneously. This can lead to overwritten changes and confusion. To mitigate this:
- Establish Clear Communication: Before starting edits, communicate which sections each person is responsible for.
- Utilize Canva’s Comments Feature: Leave specific feedback and instructions directly on the design elements.
- Create Duplicate Copies: For major revisions, create a duplicate of the design as a backup. This allows experimentation without risking the original.
- Implement a Naming Convention: Use consistent file naming to track versions (e.g., “Presentation_v1,” “Presentation_v2_VAedits”).
Maintaining Brand Consistency
Ensuring your VA adheres to your brand guidelines is crucial for a consistent brand image. Problems arise when VAs aren’t fully aware of or don’t apply these guidelines correctly.
- Share a Comprehensive Brand Style Guide: Provide a detailed document outlining your brand colors, fonts, logo usage, and overall aesthetic.
- Create Canva Brand Kits: Utilize Canva’s Brand Kit feature to pre-load your logos, colors, and fonts, making them easily accessible to your VA.
- Provide Examples of Existing Designs: Show your VA examples of past designs that effectively represent your brand.
- Regularly Review Designs: Actively review your VA’s designs to ensure they align with your brand guidelines and provide constructive feedback.
Managing Canva Access and Permissions
Carefully managing access and permissions within Canva is essential for security and workflow control. Overly broad access can lead to unintended changes or misuse.
- Understand Canva’s Permission Levels: Familiarize yourself with Canva’s different permission levels (e.g., can view, can edit, can share).
- Grant Specific Permissions: Assign the appropriate permission level to your VA based on their role and responsibilities.
- Regularly Review Access: Periodically review and update your VA’s access to ensure it remains appropriate.
Communication Breakdown and Missed Deadlines
Ineffective communication can lead to misunderstandings, delays, and ultimately, missed deadlines. This is especially true when collaborating remotely.
- Establish Clear Communication Channels: Choose a primary communication channel (e.g., email, project management tool) and ensure both you and your VA are responsive.
- Set Clear Expectations and Deadlines: Clearly communicate project goals, specific tasks, and deadlines.
- Schedule Regular Check-ins: Schedule brief, regular check-in meetings to discuss progress, address any questions, and provide feedback.
- Use Project Management Tools: Use project management tools for task assigning, progress tracking and deadlines.
By proactively addressing these common challenges, you can maximize the benefits of collaborating with your VA on Canva and create stunning, on-brand content efficiently. With the expert virtual assistant support for startups, founders, agencies, and busy professionals, you can delegate creative tasks with ease. A Dedicated Supervisor manages your VA, shift, processes, and reporting so you don’t have to.
7. Canva Integrations for Seamless Workflow
Canva’s strength lies not only in its design capabilities but also in its seamless integration with other tools, enhancing collaboration with your Virtual Assistant (VA). By leveraging these integrations, you can streamline your content creation process and ensure a smooth workflow.
Direct Sharing and Team Collaboration
Canva’s built-in sharing features allow you to directly invite your VA to collaborate on designs. You can grant different levels of access, such as ‘can view,’ ‘can comment,’ or ‘can edit,’ giving you control over the collaborative process. This eliminates the need for constant file transfers and version control issues. Your VA can work directly within your Canva account, ensuring everyone is on the same page.
Integration with Cloud Storage
Canva integrates with popular cloud storage services like Google Drive and Dropbox. This means your VA can easily access brand assets, images, and documents stored in the cloud directly from within Canva. They can also upload finished designs directly to your chosen storage location. This streamlined access improves efficiency and reduces the risk of losing important files.
Content Scheduling and Publishing
For social media content creation, Canva integrates with platforms like Buffer and Hootsuite. Your VA can design graphics and then schedule them for publication directly from Canva. This feature saves time and effort, allowing your VA to manage your social media presence efficiently.
Utilizing Canva Templates for Consistent Branding
Create branded templates in Canva that your VA can easily adapt for different purposes. This ensures brand consistency across all your content. Your VA can quickly update the text and images in the template while adhering to your established design guidelines. This approach significantly speeds up the content creation process and maintains a professional look.
8. Case Studies and Examples (illustrating successful Canva VA collaboration)
Real-world examples demonstrate the power of Canva for content collaboration between clients and Virtual Assistants (VAs). Let’s explore some hypothetical, yet common, scenarios:
Scenario 1: Streamlining Social Media Graphics
Imagine a startup founder struggling to maintain a consistent brand aesthetic across their social media platforms. They delegate social media graphic creation to their VA using Canva. The founder creates a Brand Kit within Canva, uploading logos, color palettes, and font choices. The VA then accesses this Brand Kit within Canva, ensuring all graphics adhere to brand guidelines. The founder can easily provide feedback directly on the VA’s designs within Canva, leading to faster revisions and a more cohesive social media presence. Data shows that consistent branding across social media can increase brand recognition by up to 80% , highlighting the importance of tools like Canva for collaborative brand management.
Scenario 2: Enhancing Blog Visuals
A busy marketing agency hires a VA to create featured images and other visual assets for their blog posts. The agency leverages Canva’s team features to share a folder containing templates and style guides with the VA. The VA can then quickly adapt these templates for each blog post, ensuring consistency and saving the agency significant time and resources. Collaboration features like commenting and version history allow for seamless feedback and approval processes. Businesses that consistently publish high-quality visuals on their blog see a 94% increase in total article views , demonstrating the value of efficient visual content creation.
Scenario 3: Creating Marketing Materials for a Real Estate Agent
A real estate agent outsources the creation of flyers, brochures, and social media posts to a VA. The agent grants the VA access to their Canva account, where they’ve already created templates for different marketing materials. The VA can easily update these templates with new property listings, adjust the text, and download the final designs. The agent can review and approve the designs directly in Canva before they are printed or shared online. This collaborative workflow enables the agent to focus on client acquisition and sales, while the VA handles the design work, freeing up valuable time. Effective marketing materials can significantly impact a real estate agent’s success, with studies showing that professionally designed brochures can generate up to a 30% increase in inquiries .
These examples illustrate how Canva facilitates effective collaboration between clients and VAs, allowing businesses to streamline their content creation processes, maintain brand consistency, and achieve better results. The built-in collaboration features within Canva contribute to increased efficiency and improved communication, making it a valuable tool for businesses of all sizes. By delegating creative tasks to a VA and utilizing Canva’s collaborative functionalities, businesses can free up their time and resources to focus on their core competencies.
9. Advanced Canva Tips for VA Collaboration (based on Singaporean/Australian trends)
Collaborating effectively on Canva with your Virtual Assistant (VA) can significantly boost your content creation workflow. Here are some advanced tips, reflecting trends observed in collaborative digital marketing practices within Singapore and Australia:
Strategic Use of Canva Teams and Roles
Leverage Canva’s team functionality to its fullest potential. Create dedicated teams within your Canva account, specifically for collaboration with your VA. This allows you to precisely control access and permissions. Consider assigning roles strategically. For instance, you might give your VA editing privileges for specific projects but restrict access to brand templates to maintain consistency. This structured approach is particularly popular in the organized and compliance-driven environments seen in Singaporean businesses .
Real-time Collaboration and Feedback Loops
Encourage real-time collaboration by using Canva’s comment feature. This allows you to provide instant feedback directly on the design, streamlining the revision process. Australian agencies, in particular, have embraced this approach to foster a dynamic and responsive creative environment. Implement a clear system for feedback, such as using specific emojis or prefixes in comments to indicate urgency or the type of feedback .
Template Locking and Version Control
To ensure brand consistency, lock key elements within your Canva templates. This prevents accidental modifications by your VA while still allowing them to personalize content within pre-approved guidelines. Also, familiarize yourself with Canva’s version history. This feature allows you to revert to previous versions if needed, providing a safety net during collaborative projects. This level of control is increasingly important for businesses managing multiple brand assets across different channels, a common scenario in both Singapore and Australia .
Shared Brand Kit and Design Systems
Maintain a comprehensive brand kit within Canva, including logos, color palettes, fonts, and image styles. Ensure your VA has access to this kit and is trained on its proper usage. Many Australian businesses are now extending this concept to create full-fledged design systems within Canva, providing their VAs with even more guidance and consistency. Consider documenting design guidelines outside of Canva and sharing it with your VA as well .
Task Delegation and Project Management Integration
While Canva offers basic collaboration features, consider integrating it with your project management system for more robust task delegation and tracking. You can assign specific Canva tasks to your VA, set deadlines, and track progress, all within your chosen project management platform. This is crucial for managing complex projects and ensuring deadlines are met, especially when working with VAs across different time zones .
Data-Driven Design Iteration
Encourage your VA to use Canva’s analytics to track the performance of your designs. This data can inform future design decisions and optimize your content for better engagement. Analyze which designs are performing well and iterate based on these insights. This data-driven approach is gaining traction in both Singapore and Australia as businesses increasingly prioritize ROI and measurable results from their marketing efforts .
10. Ensuring Security and Data Privacy
When collaborating with your VA on Canva, security and data privacy are paramount. You’re entrusting them with access to your designs, brand assets, and potentially sensitive information. Implementing robust security measures is essential to protect your business.
Canva’s Built-in Security Features
Canva offers several features that enhance security when working with collaborators:
- Team Permissions: Utilize Canva’s team features to grant your VA specific roles and permissions. You can control what they can edit, view, or share, limiting access to sensitive areas.
- Two-Factor Authentication (2FA): Encourage your VA to enable 2FA on their Canva account. This adds an extra layer of security, requiring a code from their phone in addition to their password.
- Brand Kit Control: If you have a Canva Pro account, carefully manage access to your brand kit. Consider creating a separate team specifically for your VA if you need to restrict access to certain brand assets.
Best Practices for Data Privacy with your VA
Beyond Canva’s features, establish clear guidelines and protocols with your VA regarding data handling:
- Data Sharing Agreements: Outline the types of data your VA will be handling, how it should be stored and processed, and what security measures they must adhere to.
- Confidentiality Agreements (NDAs): Have your VA sign a non-disclosure agreement to legally protect your confidential information.
- Password Management: Discourage sharing Canva login credentials. Instead, use Canva’s team invitation feature. If you do need to share a password, use a secure password manager like LastPass or 1Password and revoke access immediately after the task is complete.
- Regular Audits: Periodically review your VA’s access permissions and activity logs within Canva to ensure compliance with your security policies.
- Secure Communication Channels: Use secure communication channels for sharing sensitive information, such as encrypted email or messaging apps. Avoid sending passwords or confidential details via unsecured methods.
- Data Deletion Policies: Define clear procedures for deleting sensitive data after it’s no longer needed. Ensure your VA understands and follows these procedures.
By implementing these security measures and establishing clear data privacy protocols, you can confidently collaborate with your VA on Canva while safeguarding your valuable business assets.
FAQ: Collaborating with Your VA on Canva
Canva is an excellent tool for collaborating on content with your virtual assistant (VA). Its user-friendly interface and robust sharing features make it ideal for streamlining design workflows. Here’s how you can effectively leverage Canva for collaborative projects with your VA:
How do I share Canva designs with my VA?
Canva offers several ways to share your designs, each with different permission levels:
- Direct Sharing via Email: You can invite your VA to access a specific design by entering their email address in the “Share” section of Canva. You can grant them “Can edit” access to allow them to modify the design, or “Can view” access if you only want them to provide feedback without making changes.
- Team Sharing: Canva allows you to create a team, which is particularly useful if you’re working with multiple VAs. By adding your VA to your team, you can easily share designs and templates with them. This simplifies the process of managing access to various design assets.
- Share a Template Link: If you want your VA to use a design as a template for multiple projects, you can generate a template link. This allows them to create copies of the original design without altering it.
What level of access should I give my VA on Canva?
The appropriate access level depends on the tasks you’ve delegated to your VA. Here’s a general guideline:
- “Can Edit”: This is suitable for VAs who will be actively creating and modifying designs. They can make changes, add elements, and adjust the layout.
- “Can View”: This is best for VAs who are providing feedback or reviewing designs before they are finalized. They can’t make any changes, ensuring the original design remains intact.
- Template Access: If your VA needs to create multiple designs based on a master template, sharing a template link is the most efficient option.
How can I provide feedback and revisions to my VA on Canva?
Canva’s commenting feature makes it easy to provide feedback directly on the design. Here’s how to use it:
- Add Comments: Click on any element in the design and click the comment icon to add a specific note. This ensures your feedback is directly related to the area that needs attention.
- Tag Your VA: Use the “@” symbol followed by your VA’s name to tag them in the comment. This will notify them that you’ve left feedback for them to review.
- Mark as Resolved: Once your VA has addressed your feedback, they can mark the comment as resolved, helping you keep track of completed revisions.
What if I need my VA to create Canva designs from scratch?
If you want your VA to create designs from the ground up, ensure they have “Can edit” access to the appropriate team folder or design. You might also provide them with brand guidelines, color palettes, and logo files to maintain consistency in your designs. Consider leveraging flexible hourly or team-based plans for your VA’s services. Options include curated Hourly Monthly Plans or building a team with Dedicated Plans. This allows you to delegate creative tasks efficiently, while a Dedicated Supervisor manages your VA, shift, processes, and reporting so you don’t have to.
Q: What’s the best way to invite my VA to my Canva account?
Canva makes collaboration relatively straightforward. The best approach for inviting your Virtual Assistant to your Canva account depends on the level of access and control you want to grant them.
Team vs. Individual Access
Consider whether you want your VA to work within a shared “Team” environment or just access individual designs. Creating a team allows for consistent branding and easy sharing of assets, but may require a Canva for Teams subscription for the full suite of features. If your VA only needs to contribute to specific projects, inviting them to those projects directly might be sufficient.
Inviting Your VA as a Team Member (Recommended for ongoing collaboration)
For consistent, collaborative work, inviting your VA to your Canva team is ideal. Here’s how to do it:
- Log in to your Canva account.
- Navigate to “Team” settings. This is usually found in the left-hand sidebar of your Canva dashboard, often under “Shared with you”. If you have Canva for Teams, it may be labeled more explicitly as “Your Team” or similar.
- Click “Invite people”. This button should be clearly visible within your team settings.
- Enter your VA’s email address. Ensure you are using the correct email address to avoid access issues.
- Choose their role. Canva typically offers different roles with varying permission levels (e.g., Admin, Designer, Member). Carefully consider what level of access your VA needs. Giving them “Admin” access grants the most control, while “Member” provides more limited access. A “Designer” role strikes a balance.
- Send the invitation. Canva will send an email invitation to your VA, prompting them to join your team.
Inviting Your VA to Specific Designs
If you prefer to grant access to only certain designs, follow these steps:
- Open the design you want to share.
- Click the “Share” button. This is typically located in the top-right corner of the design editor.
- Enter your VA’s email address.
- Choose their access level. You can usually select whether they can “View only,” “Comment,” or “Edit.”
- Send the invitation.
Consider that when you delegate marketing tasks, creative tasks or even admin tasks to your VA on Canva, a dedicated supervisor to manage processes and reporting could benefit the speed and efficiency of workflows.
Q: Should I give my VA admin access to my Canva account?
Deciding whether to grant your Virtual Assistant (VA) admin access to your Canva account depends on the level of control and autonomy you want them to have, and the tasks you’re delegating. Giving admin access offers benefits, but it also comes with potential risks.
Understanding Canva Roles and Permissions
Before granting access, familiarize yourself with Canva’s different roles. This will help you choose the most appropriate level of permission for your VA. Options typically include:
- Admin: Full control over the Canva account, including billing, team management, and brand settings.
- Template Designer: Access to create and edit templates, which is useful for maintaining brand consistency.
- Brand Designer: Focuses on brand assets, such as logos and color palettes.
- Member: Can create and collaborate on designs, but typically without administrative privileges.
Factors to Consider
Weigh these factors when deciding on the appropriate access level:
- Scope of Responsibilities: If your VA is responsible for managing your entire brand presence on Canva, including templates, brand assets, and team members, admin access might be necessary. If they’re primarily focused on creating designs based on existing templates, member access may suffice.
- Level of Trust: Consider your trust level with the VA. Admin access grants significant control, so ensure you have a strong working relationship and clear understanding of expectations.
- Security Concerns: Understand that admin access grants the ability to change billing information and potentially remove you from the account. Assess the security implications carefully.
- Alternatives to Admin Access: Explore alternatives, such as granting access to specific teams or folders. This can provide sufficient access for collaboration without granting full administrative control.
Best Practices for Collaboration
Regardless of the access level you grant, implement these best practices for effective collaboration:
- Clear Communication: Establish clear communication channels and expectations regarding design guidelines, brand voice, and approval processes.
- Regular Reviews: Regularly review the designs created by your VA to ensure they align with your brand standards.
- Version Control: Use Canva’s version history feature to track changes and revert to previous versions if necessary.
Remember, you can adjust access levels as needed. Start with a more restrictive role and grant additional permissions if the VA requires them. This approach minimizes risk while still enabling effective collaboration on Canva.
Q: How do I prevent my VA from accidentally changing my brand colors?
Maintaining brand consistency is crucial, and accidentally altering your brand colors in Canva can be a real headache. Here’s how to safeguard your brand identity when collaborating with your VA:
1. Utilize Canva’s Brand Kit
Canva’s Brand Kit is your best friend! This feature allows you to upload and save your brand colors, logos, and fonts in one central location. This creates a unified look and feel.
- How it helps: Once set up, your VA can easily access and use the correct colors and fonts without accidentally picking the wrong ones.
2. Lock Down Key Elements
Within a design, you can lock specific elements, including color palettes and background colors.
- How it helps: By locking the brand colors, your VA can work on other parts of the design without the risk of unintentionally changing the core brand elements.
3. Create Template
Creating templates with pre-set elements, including brand colors and fonts, streamlines the design process and ensures consistency. This is especially useful for recurring content like social media posts or email headers.
- How it helps: Your VA can focus on customizing the content within the template while maintaining the core brand identity.
4. Regular Reviews and Feedback
Even with safeguards in place, it’s essential to review your VA’s work regularly. Provide clear and constructive feedback on brand adherence and any necessary adjustments.
5. Clear Communication and Guidelines
Provide your VA with clear and comprehensive brand guidelines that detail your color palette, font choices, and overall brand aesthetic. Regular and effective communication is key to prevent errors.
Employing these strategies within Canva helps ensure your VA can contribute creatively while preserving your brand’s visual identity. Delegating creative tasks to a virtual assistant can free up your time, but it’s crucial to provide them with the right tools and guidance to maintain brand consistency.
Q: How can I ensure design consistency across all my content?
Maintaining design consistency is crucial for building a strong brand identity. Canva offers several features to help you achieve this when collaborating with your Virtual Assistant (VA):
1. Brand Kit
Canva’s Brand Kit is a central hub for your brand assets. You can upload your logo, define your brand colors, and choose your brand fonts. Your VA can then easily access these elements directly within Canva, ensuring they are used consistently across all designs. This significantly reduces the risk of using incorrect colors or fonts.
2. Templates
Create a library of branded templates that your VA can use as a starting point for new content. These templates can include pre-designed layouts, image placeholders, and text styles, all reflecting your brand guidelines. This helps maintain a consistent look and feel across all your marketing materials.
3. Style Guides (Documented Brand Guidelines)
While the Brand Kit is helpful, a more detailed style guide is essential. This document (which can also be created in Canva!) should outline specific rules for font usage (e.g., heading fonts vs. body fonts), color palettes (primary, secondary, and accent colors), image styles (e.g., photography vs. illustrations), and voice/tone guidelines. Sharing this comprehensive guide with your VA will minimize misinterpretations and ensure a cohesive visual brand identity.
4. Clear Communication & Feedback Loops
Even with all the tools in place, clear communication is paramount. Establish a process for your VA to share drafts with you for review and feedback. Provide specific and constructive feedback on design elements, ensuring alignment with your brand guidelines. This iterative process allows you to refine the designs and maintain consistency over time. Consistent feedback is key to improving a VA’s output.
5. Version Control & Organization
Canva allows you to easily duplicate designs and create different versions. Encourage your VA to use descriptive names for their designs and to keep everything organized in folders. This makes it easier to track changes, revert to previous versions if needed, and avoid confusion.
Q: What happens if my VA makes a mistake in a design?
Mistakes happen! The beauty of Canva, especially when collaborating with a VA, is the ease of correction and version control.
Here’s a breakdown of how to handle design errors:
Canva’s Version History: Your Safety Net
Canva automatically saves your work and maintains a version history. This means you can easily revert to a previous version of your design if your VA makes a mistake or introduces an undesired change. This feature allows you to track changes and restore previous iterations with ease, ensuring no work is permanently lost.
Clear Communication and Feedback
To minimize mistakes, establish clear communication channels with your VA. Provide detailed briefs, style guides, and examples of what you’re looking for. Encourage your VA to ask questions and seek clarification before proceeding. Constructive feedback is essential. Clearly explain what needs to be changed and why. This will help your VA learn and improve over time.
Collaboration Features for Review
Utilize Canva’s commenting and annotation features to provide feedback directly within the design. You can highlight specific areas, leave comments explaining desired changes, and tag your VA for attention. This facilitates a more collaborative and efficient review process.
Setting Access Permissions
Consider setting appropriate access permissions for your VA. While collaboration requires granting access, carefully evaluate whether your VA needs full editing rights. You can grant “view only” or “comment only” access initially and gradually increase permissions as your VA becomes more familiar with your brand and style.
Your Dedicated Supervisor Advantage
With expert virtual assistant support, a Dedicated Supervisor manages your VA, shift, processes, and reporting. They can monitor the quality of work, ensuring designs meet your standards and minimizing the occurrence of mistakes. They also facilitate clear communication and provide ongoing training to your VA, further reducing the risk of errors.
Q: How can I provide feedback effectively to my VA on Canva designs?
Canva offers several built-in features to facilitate clear and efficient feedback between you and your Virtual Assistant:
- Commenting Directly on Designs: Use Canva’s commenting feature to leave specific feedback directly on the design elements. Point out exactly what needs adjustment by clicking on the element and adding your comment. This avoids miscommunication and ensures your VA understands the precise issue.
- Using Canva’s Suggest Edits Feature: Depending on your Canva plan, you might have access to the “Suggest Edits” feature. This allows your VA to make suggested changes that you can then approve or reject, providing a clear audit trail of the revisions.
- Creating a Shared Style Guide: Develop a clear brand style guide (colors, fonts, logo usage) and share it with your VA via Canva or another shared document. This ensures brand consistency across all designs and minimizes the need for repetitive feedback.
- Offering Examples: Instead of just saying “make it pop,” provide examples of what you mean. Share links to Canva templates or other designs that illustrate the desired aesthetic.
- Holding Regular Check-ins: Schedule brief video calls or screen shares to review designs in real-time. This allows for more dynamic feedback and addresses questions immediately.
- Utilizing Status Updates: Encourage your VA to use Canva’s built-in status updates (“In Progress,” “Needs Review,” “Approved”) to keep you informed of the project’s progress.
- Leveraging Canva’s Version History: Take advantage of Canva’s version history to revert to previous versions if necessary. This allows you to compare iterations and provide specific feedback on which version you prefer and why.
Effective feedback is key to a successful VA partnership. By using Canva’s features and establishing clear communication strategies, you can ensure your VA consistently delivers high-quality designs that align with your brand vision.
Q: Is Canva Pro necessary for effective VA collaboration?
While you can collaborate effectively on Canva using the free version, Canva Pro significantly enhances the experience, particularly for VA collaboration focused on regular content creation and brand consistency.
Here’s a breakdown:
Canva Free: Collaboration Limitations
- Limited Templates and Assets: The free version offers a smaller library of templates, stock photos, and graphics. This might restrict your VA’s ability to create diverse and high-quality content aligned with your brand.
- No Brand Kit: Maintaining brand consistency can be challenging in the free version. Without a Brand Kit, your VA will have to manually input colors, fonts, and logos for each design, increasing the chance of errors and inefficiencies.
- Storage Restrictions: The free version has limited storage space, potentially forcing you to constantly manage files and making it difficult to maintain a comprehensive library of assets.
- Team Size: While collaboration is possible, the free version may have limitations on the number of team members that can be easily accommodated for more robust, continuous workflows.
Canva Pro: Collaboration Advantages
- Extensive Template and Asset Library: Canva Pro unlocks millions of premium templates, stock photos, graphics, and videos, providing your VA with a wealth of creative resources to develop engaging content.
- Brand Kit: A Brand Kit allows you to store your brand logos, colors, fonts, and design guidelines in one place. This ensures brand consistency across all designs created by your VA.
- Unlimited Storage: With unlimited storage, your VA can easily organize and manage all design assets within Canva, streamlining the workflow.
- Team Features: Canva Pro offers enhanced team features, including the ability to easily share designs, leave comments, and manage access permissions, facilitating seamless collaboration between you and your VA.
- Magic Resize: The Magic Resize feature lets you quickly adapt designs for different platforms (e.g., Instagram post to Facebook ad), saving your VA significant time and effort.
- Background Remover: The background remover is a handy tool for creating professional-looking visuals quickly.
Ultimately, the decision of whether or not to use Canva Pro for VA collaboration depends on your specific needs and budget. If you’re serious about brand consistency, high-quality content, and efficient workflows, Canva Pro is a worthwhile investment. If your content needs are minimal and brand consistency is less critical, the free version might suffice.
Consider the value of your VA’s time. If Canva Pro features save your VA time, the investment might pay for itself in terms of increased productivity and better content output. Many businesses find that the small cost of Canva Pro more than justifies itself in better content quality and faster turnarounds.
Q: How do I handle licensing for stock photos used in Canva designs?
When using Canva for collaborative content creation with your VA, understanding stock photo licensing is crucial to avoid copyright issues. Canva offers a range of stock photos, some of which are free and others that require a license or purchase.
Understanding Canva’s Licensing Options
Canva provides two primary licensing options for stock photos:
- Free Photos: These photos are available for use under Canva’s Free Media License Agreement. Generally, you can use them for commercial and non-commercial purposes. It’s always advisable to review the specific terms of the free license to understand any restrictions.
- Pro Photos (Canva Pro or Paid License): Photos marked with a crown icon require a Canva Pro subscription or a one-time purchase. Canva Pro provides a broader license, allowing for wider commercial use, including designs for sale. If you don’t have Canva Pro, you’ll need to purchase a license for each individual image you use.
Best Practices for Managing Licenses with Your VA
To ensure compliance and avoid potential legal issues when collaborating with your VA on Canva designs, consider these best practices:
- Maintain a Canva Pro Subscription: This provides access to a vast library of licensed photos and simplifies the licensing process. Sharing your Canva Pro account with your VA (depending on Canva’s terms of service) can streamline the process.
- Clearly Communicate Licensing Guidelines: Before your VA starts designing, clearly outline the acceptable sources for stock photos (e.g., Canva Pro library only).
- Document Photo Usage: Keep a record of which photos are used in each design, and note the license type (free or purchased). This can be done in a shared document or a project management tool.
- Review Designs Before Publication: Before publishing any content created by your VA, double-check that all stock photos are properly licensed.
- Purchase Licenses for Specific Images: If you choose not to use Canva Pro, ensure your VA is instructed to purchase licenses for any premium photos used. Keep a record of these purchases.
By implementing these guidelines, you can effectively manage stock photo licensing and minimize the risk of copyright infringement when collaborating with your VA on Canva designs.
Q: What’s the best way to organize designs when working with a VA?
Effective organization is crucial for smooth collaboration with your VA in Canva. A well-structured system will save time, reduce confusion, and ensure consistent branding.
Folder Structure
Create a logical folder structure within Canva. Consider organizing by:
- Project: Dedicated folders for each marketing campaign, website update, or social media initiative.
- Content Type: Separate folders for social media graphics, presentations, documents, and videos.
- Brand: If you manage multiple brands, create a top-level folder for each.
- Status: Use folders like “Drafts,” “In Review,” “Approved,” and “Completed” to track progress.
Naming Conventions
Establish clear naming conventions for files. This helps quickly identify and locate designs. For example:
[Project Name]_[Content Type]_[Date]_[Version Number]SocialMedia_Instagram_Post_08232024_V2
Using Canva’s Brand Kit
Leverage Canva’s Brand Kit feature to store your brand’s logos, color palettes, and fonts. This ensures consistency across all designs created by your VA. Your VA can have quick and easy access to the correct colors, fonts, and logos when creating content, thus keeping the brand on point.
Template Creation
Create templates for frequently used designs. This streamlines the design process and ensures brand consistency. Your VA can then easily adapt these templates for different purposes.
Version Control
Canva’s version history allows you to track changes and revert to previous versions if needed. Encourage your VA to utilize this feature, especially when making significant edits.
Communication is Key
Maintain open communication with your VA regarding design preferences, feedback, and any revisions needed. Regular check-ins and clear instructions will ensure everyone is on the same page and minimize errors. Using a communication tool alongside Canva will help the entire collaboration process.
Q: Can I track the changes my VA makes in Canva?
Yes, Canva offers features that allow you to track changes made by your VA, though the level of detail depends on your Canva plan. Here’s a breakdown:
Canva Pro and Teams: Version History
If you are on Canva Pro or Canva for Teams, you have access to a robust version history feature. This allows you to:
- See previous versions of a design: Canva automatically saves different versions as your VA works on a project. You can easily revert to an older version if needed.
- Identify specific changes: While not always detailed down to every single click, you can generally identify the major changes made between versions. You can see when elements were added, removed, or modified.
- Track who made the changes: The version history usually indicates which user (your VA) made the edits.
Free Canva Plan: Limited Tracking
With the free Canva plan, the version history is much more limited. You may not have access to the same level of detail as Canva Pro or Teams. However, Canva automatically saves design as work is completed. Your VA will need to clearly communicate with you about the work done.
Collaboration Best Practices
Regardless of your Canva plan, clear communication with your VA is crucial for effective collaboration. Encourage your VA to:
- Comment on designs: Use Canva’s commenting feature to explain design choices, ask questions, or request feedback.
- Provide regular updates: Keep you informed about their progress and any major changes they’ve made.
- Name design versions clearly: When creating significant revisions, your VA can create a copy and name it descriptively (e.g., “Flyer_v2_with_new_offer”).
By combining Canva’s features with good communication practices, you can effectively track your VA’s contributions and ensure your design projects stay on track.